Liz and I decided to do an art project for Burning Man this year. In the past, our BM projects have tended to be large, technologically complex, electronic and highly intellectualized. This year we decided to invert all of that and improvise a project, rather than trying to think through all of the details ahead of time. (OK, truth be told, we were also short on time)
We started with elements from projects we've done and enjoyed. I wanted to follow up on Bass Ghost and do another subsonic vibration piece. Liz wanted to follow up on Nervous Jello and do something jiggly. Jiggly + subsonic seemed like a good combination, however there was immediately a problem: Jello won't survive a week out in the desert. And that's where the improvisation started.
Silicone
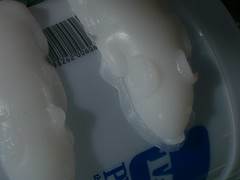
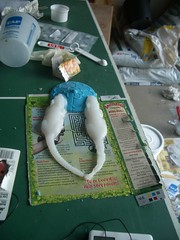
I suggested we make stuff out of silicone, which is also jiggly. The process looked straightforward based on some web sites we'd read, so we plunged in. I had seen some antique confectionary molds at an antique show the month before and thought that vibrating translucent bunnies and elves could be interesting, so I went on Ebay. While doing the research on Ebay, we stumbled across contemporary, inexpensive plastic vacuum-formed chocolate molds. Within an hour we had bid on half a dozen of the more interesting ones and had them in hand by the end of that week.We bought our first batch of silicone at TAP Plastics, in Tigard, OR. It was a basic hobbyist kit and worked great (in the photos on Flickr, it's the blue stuff). In the process of using the kit we learned that silicone comes in two parts: a resin and a catalyst. Unlike other materials that "dry" by evaporating some solvent, the catalyst changes silicone's basic structure when the two are mixed. Thus, there's little shrinkage and you get decent control over the timing of how quickly the resin sets by how much catalyst you use. Setting times can vary from 16 hours to under 5 minutes, depending on which catalyst is used, and how much of it is used. We were going to be working quickly in small batches, so we used translucent silicone and ultra fast catalyst from Stephenson Pattern in Portland. We picked the silicone for maximum jiggle, with help from the salespeople at Stephenson. It's still less wobbly than jello, but pretty wobbly.
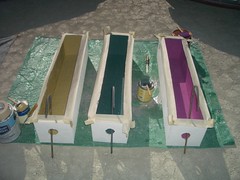
The casting process required a day of tinkering with proportions (see Problems section below), but once we figured out the right formula for our purposes casting was quite straightforward:
- Spray with mold release
- Mix the ingredients quickly, but thoroughly
- Pour from about 18 inches above the mold
- Wait an hour
- Demold
- Let settle while repeating steps 1-5
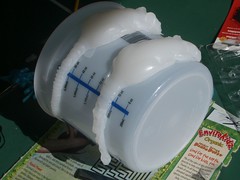
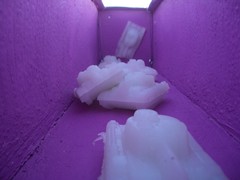
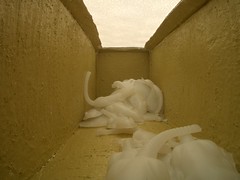
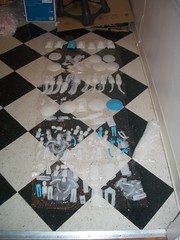
With Tim and Patricia's help (we were using their garage and they were amazingly generous with their time and stuff throughout the process) we managed to crank out a dozen jiggly tanks, rats, people, outhouses and carousels in a couple of afternoons.
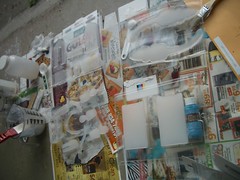
Here's a shot of our Portland kitchen before we shipped all the stuff to San Francisco:
Boxes
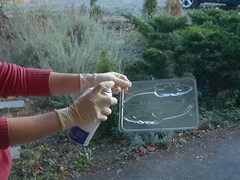
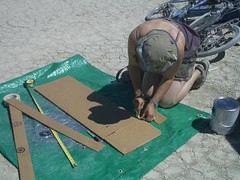
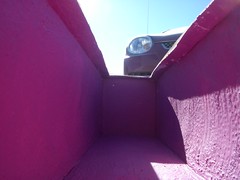
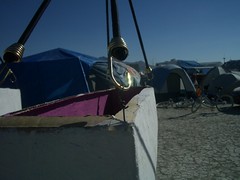
Once we had the cast objects, we needed to put them somewhere. We started the improvisation at Building Resources in San Francisco and finished it on the way to Burning Man in Carson City, NV.I wanted to build plywood boxes, but Liz pointed out that cardboard was potentially a lot easier to work with, if we could find the right boxes. We just happened to pass a Box Store outlet in Carson, which had boxes that worked. Here's Liz making sure it's OK, while I take a picture from inside to see what the view will be like:
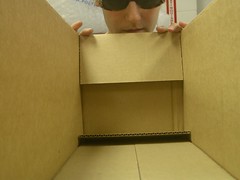
We cut most of the top flaps off to let light in and cut the corners so they would sit flat, rather than overlap like on a standard box:
Then we taped using a roll of red water-activated reinforced packing tape that the Box Shop gave us. This tape is terrific. You wet it and gives you about 30 seconds of working time (in the desert sun) to align it right before it sets solid.
Then we painted the whole thing with texture paint, inside and out (outside needed something like 3 coats).
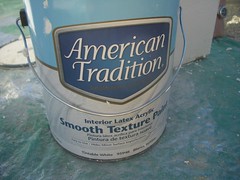
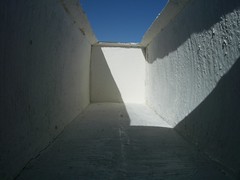
The texture paint removed nearly all of the "cardboardness" from the finished boxes and, as Liz put it hid our sins. Great stuff. We then painted the insides with paint that we bought from the Oops shelf at Lowe's Carson City. The strategy of using whatever paint was on the shelf worked well with the improv theme of the project and was a dirt cheap way to get a bunch of paint in interesting colors.
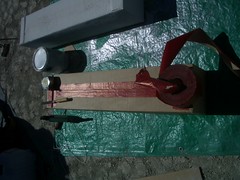
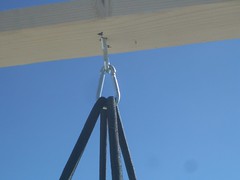
We built the frame for the boxes out of 2-by-4s using metal framing brackets:
To allow people to see the jiggliness, we hung the boxes using bungees attached to carabineers to eye bolts on both the frame and inside the bottom of the boxes (where they're attached to the bungees with baling wire):
Lessons learned
- Jiggle amplitude. You may notice that although this was supposed to be a subsonic piece, there was no subsonic component to it. That's because I realized in preparation that both the amplitude and frequency of the bass shakers available to me would not be enough to shake the thing. I bought an antique Oster M1 vibrator, er, "massager" from the 1930s (search for "oster massager" on Ebay to see one--they've been making them almost unchanged for like 70 years), but its frequency was also too high. I really need something like the Oster, but heavier and moving at about 5Hz.
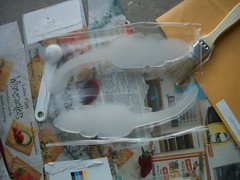
- Silicone bubbles. Silicone develops bubbles when mixed well. Some of these float to the top of the wet silicone, like any liquid, but when the silicone sets quickly, as with ultrafast catalyst, most don't. We tried to eliminate this by pouring from 18 inches or so, which created a thin stream of silicone and thus forced the bigger bubbles toward the surface, but some were still left. With our application and translucent silicone, it's not a problem, but if we were doing this with clear silicone, I would use a vacuum chamber and a slower catalyst to force the bubbles to the surface.
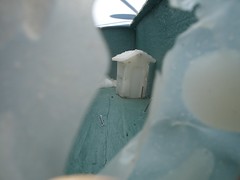
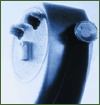
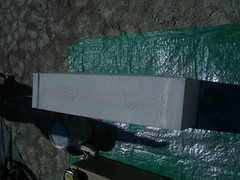
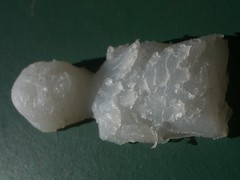
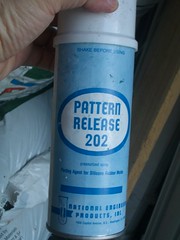
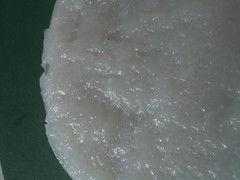
- Getting the things out of the molds is a pain if you don't prepare for it. Using lots of mold release (or just Vaseline, since mold release is just aerolled petroleum jelly) is important. We used the release we bought ffrom TAP at first, but either we didn't use enough or it was the wrong stuff. Here's what happened:
We got different release from Stephenson Pattern, which worked great:
However, we did overspray it, and a texture was starting to develop on the mold, which would have required cleaning off after a while.
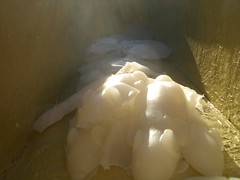
- Catalyst proportion. As mentioned above, we spent a whole afternoon experimenting with catalyst proportions. With the small quantities we were mixing (we only had a couple of molds), we couldn't make big batches, and a small difference in proportion of catalyst (10% vs 20%) makes a big difference in setting times (4 hours versus 1 hour, for example), so we needed a lot of experimentation. We ended up using between 20 and 25 catalyst, which is high, but it gave us about 5 minutes of working time after the mixing began and the silicone set in under an hour, so we could demold quickly and turn around another batch. Next time, we'll buy more cheap molds so we can make bigger batches and control the proportion more carefully and have longer working time. When we added too much catalyst, the mixture started setting before we had a chance to pour and the results looked like this:
- Affixing silicone to silicone is virtually impossible. Silicone is super-duper inert, which is great for some things and terrible if you want to stick it to anything. There's a glue that's available from Smooth-on, but it's rare (we weren't able to get any either in Portland or in San Francisco) and apparently expensive. We ended up using nails to attach the things to each other. Attached at 45-degree angles away from each other worked well.
- Maximizing jiggle. Silicone doesn't jiggle like jello, and most of our casts were of things that were low and flat, which minimizes jiggle, anyway. Our solution was to pile stuff high, but next time we'll probably just cast tall, thin things.
- Lighting. To light the interior during the day we used a fluorescent light diffusion plastic for the top, cut into shape. For nighttime lighting, we bought a set of solar-powered LED spotlights at Lowe's. They were bright enough to make the piece work at night and $50 for the 3, a little pricy, but worth it.
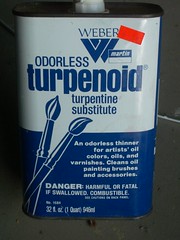
- Cleaning. The best way to clean our silicone casting materials was simply to let the silicone set and then peel it off. For some things, such as buckets, we first sprayed mold release, but it wasn't necessary: after an hour, we just peeled a bucket-shaped piece of silicone from the inside of the bucket and that was that. Cleaning the release was a little tougher, but Tim's suggestion to use a turpentine substitute did the trick (thanks, Tim!):
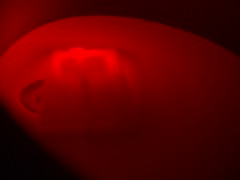
- LED inclusion. We did some experiments embedding LEDs into the silicone. It totally worked, and looked great underwater, but we decided that wiring all of the LEDs was more trouble than we were willing to go through, so we abandoned the idea.
Meaning
Since we improvised the content, we didn't have a particularly strong narrative structure going in and whenever we attempted to create one, it didn't seem to fit. I had initially wanted one dream to be good, one to be bad and one to be ambiguous. Liz had different narrative plans. The end result is ambiguously nightmarish. Since our process, I have been told, is not unlike that of Jungian Sand Tray methods, a lot can be read into our choice of symbols and our arrangement of the symbols. We're actually trying not to go there, and we tried explicitly to avoid making it an antiwar statement or a statement on fear and claustrophobia, though both of those sentiments are close to us and there are certainly some such aspects in the piece.